The
graphic formula editor can be used to create visually attractive
formulae. It is recommend to use it when the focus is on appearance.
Data is entered on the left-hand side in natural mathematical
notation. Data entry is controlled by several buttons on the right-hand
side, respectively formula are extended. Using the Variable list all
available variables can be displayed and inserted.
Graphic
formulae can
be used in the text without having to use the calculating functionality.
The user can choose between various display options:
- Standard: The formula is displayed with the aid of variables.
- With numerical values: Either the variables and the numerical values or just the numerical values are displayed. If both are displayed, it is possible to determine whether the formula is displayed on one line or two. The latter is recommended or may even be necessary for longer
formulae.
BUTTON: |
 |
HOTKEY: |
CTRL+F9 |
MENÜ: |
Calculate - Graphic
formula |
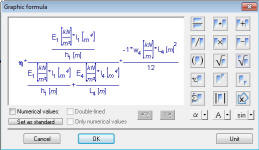
Data Entry
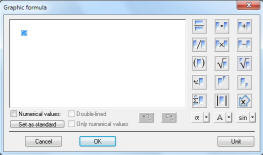
A
placeholder is preallocated on the left side (small blue box).
Variables and numerical values can be entered directly via the keyboard.
Entry of a term is concluded with ENTER or with an arithmetic operator. The "
+", "
-", "
x" and "
/" keys automatically create
new terms. This supports faster data entry.
In addition, the key combinations
CTRL+D for subscripts,
CTRL+E for superscripts and
CTRL+T for the square root function simplify the input.
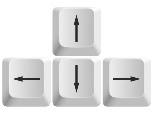
IMPORTANT: After completing the entry of a term, the cursor keys can be used to navigate in the formula editor.
More
complex formulae are created trouble-free with the buttons on the
right.
For very complex formulae, it is recommended to set up
the basic structure first. Begin with the root function sign,
for example, and the essential fraction strokes. Then fill in the
placeholders.
Greek characters and trigonometric functions are inserted using the lower selection buttons. Incorrect
entries can be cancelled using the arrow buttons.
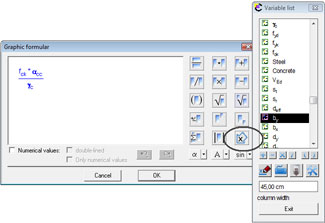
All defined variables can be adopted automatically using the
Variable list (see illustration to the right).
Summation:
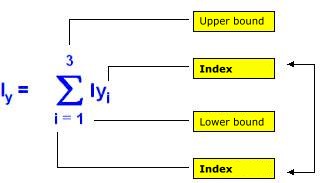
The entry of a total corresponds with the
mathematical rules.
Note: The index must be identical with the index of the variable.
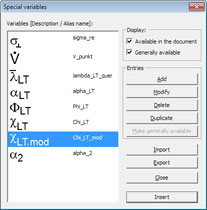
Various
subject-specific variables are either not included in Windows character
sets or they contradict VCmaster’s rules of mathematical
interpretation.
Missing variables can be created as a bitmap
without any design restrictions. Aliases are used for the mathematical
interpretation. Please use names that are considerably different from
common variable names!
The variables are either stored on
the PC or in the document. For files to be circulated a contained
variable can be copied onto the PC by the
Make generally available
option. The options
Import and
Export transfer data between various PCs.
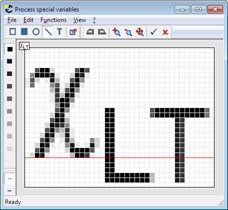 Add
Add or
Modify calls up the mask for modifying the variables. The height, width and baseline are shown in pixels. The
latter defines the vertical position in the text.
Note: In the case of normal font sizes (9 to 12) the baseline interval is 6 pixels. The height and width result from the
entered symbols. Guideline value for the height: 2 x font size + 6.
Data EntryEntering data is carried out
similar to the
Editing images option. For deleting sections, use a white
rectangle, for saving use the blue check mark.
HOTKEY: |
CTRL+F2 |
MENÜ: |
Insert-Special variables |
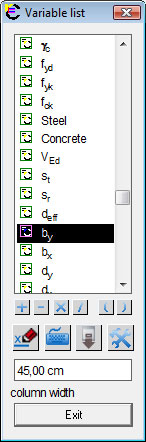
Writing
formulae is a somewhat arduous task for index-related notations.
VCmaster's
Variable List provides effective assistance. It displays all
variables available for further calculation at the current text
passage. The variables can be selected and transferred into a new
formula. Indices are also taken into account and do not have to be
entered again. Brackets and arithmetic operators can be addressed
directly. Another option is to write parts of the formula in the text
and extend it by using the
Variable List (or vice versa).
A
variable is selected per mouse click. It is transferred into the
document with a further click on the left or right mouse key. Instead
the
Insert button can be used.
Arithmetic operators and brackets
are created by using the relevant button. For switching to the VCmaster
data entry, please use the middle button. For exiting the variable list
use the
Exit button.
The
Variable List can be extended gradually.
Additionally the lower part displays the value of the variable. Has a
text been entered prior to the variable, it is also displayed. Therefore
the
Variable List is well-suited for checking values.
BUTTON: |
 |
HOTKEY: |
F9 |
MENÜ: |
Calculate-Variable list |
Fast input mode
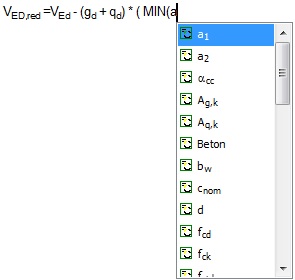
Image: Fast input mode for variables
While entering data a list of variables can be called up. This list is placed at cursor position. Results are refined after entering the first letter(s).
Simplifying and accelerating the input of variables, as specific variable names are not always present. Fast input mode also prevents unnecessary typing errors and associated corrections. Navigation in the variable list is carried out via cursor.
Variables are selected using either the Enter key or the Space bar.
Checking formulae and values of variables is important. The following
functions are available for this:
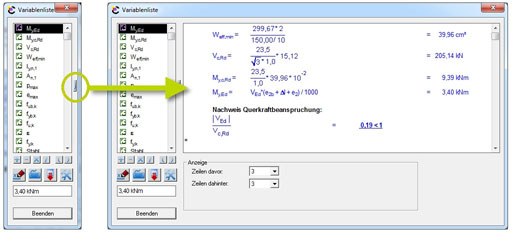
Checking the
definition of a variable in Variable ListThe definition
point of the selected variables can be displayed in the
Variable List
(figure below). How many lines are to be displayed prior or thereafter can be
set. Clicking on the arrow symbol (encircled) once more hides the review
again.
 Checking the variables of a formula if numerical values are displayed
| If numerical values are displayed, hovering the cursor over the graphical formula shows the variables. |
 |
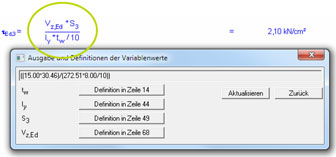
Checking the numerical values of a formula if the variables are displayed
Values and definition point can be checked by
using
either the Toolbox or the context menu
(Display values of
Variables). |
 |
2.2.5 Toolbox for Calculation Lines
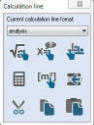
The toolbox shown on the
left is a convenient solution for editing and formatting calculation lines.
Alternative: Context menu for calculation lines.
The following functions are available:
BUTTON: |
 |
MENÜ: |
Extras-Toolbox on/off |