The header is displayed in the upper area and the footer in the lower
area of the split window. It doesn't matter whether the fields are
entered in the header or the footer. Unlike the example the project and
position description may also be placed in the header.
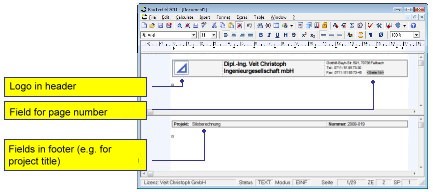
A simple table is used to place text blocks and graphics next to each
other. Frames can be made visible or invisible. If using a
table, leave a blank line prior to and directly after the table (it
may be necessary to reduce the top edge of the page). Please create
headers and footers using VCmaster tables only. Headers from other
programs copied via the clipboard tend to cause problems later.
Note on tables in headers and footers: To place text blocks and graphics next to each other, please use
a simple table. The frames can be shown or hidden. If you use a table, please leave a blank line before and after the table (to do this, you may need to reduce the top edge of the page). Please design the headers and footers using the VCmaster tables only. Headers from other programs that were copied via the clipboard sometimes cause problems later.
Fields
are place holders for information linked with headers and footers or the
document itself. Examples are page numbers or additional information
about the project. Data entered is updated automatically. As a result a
header once created only needs occasional editing.
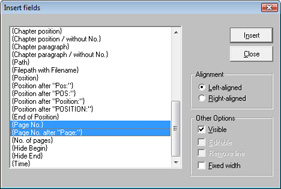
Fields are
inserted using
Fields – Fields with updating function. They are
frequently used with headers and footers, not excluding the use within
the document itself (e.g. for project data on the first page or max.
numbers of pages). Some fields are commonly only used in headers or footers,
e.g. page numbers.
The project data is linked to the header via
fields. A prerequisite is that the data for the project is entered
under
File - File information (see figure). The headers and footers are
automatically updated.
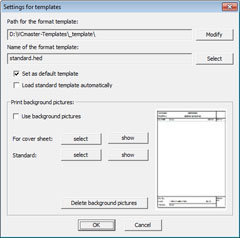
A template is called up automatically when starting VCmaster. Background images can be assigned to any template (see image on the right). Fields
containing information regarding the project are updated automatically, so headers don't have to be modified separately.
When switching projects, a different template can be selected via
File-Template Manager-Select Format Template as Default Template.
This renders
an entry from scratch unnecessary.
Any
image can be used as a background in the
As background Image function. Two different background illustrations can be specified. The first one is used on the pages without headers and footers, the second on
all remaining pages. See also
Chapter 4.3 Headings and table of contents.
Frames can also be used as background images if the document is to be issued on standardized pages. Another
field of application is design where corporate identity is of importance.
The procedure is as follows:
- Create or open the required background illustration with a program of your choice (e.g. CAD program, PDF document, etc.).
- Print the document via the t2W interface. The interface window opens.
- Select File - As Page Frame from the menu. Save this file under a name.
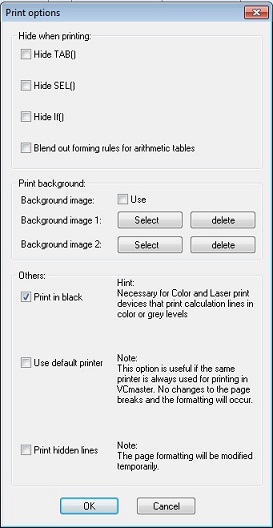
- Switch to VCmaster: Via File – Settings – Print
Option / Hiding select Background Image 1 for pages without headers and
footers and Background Image 2 for pages containing headers and footers.
(This may also be done later on.)
Note: Background images contained in the document can be reselected or deactivated later at any time under
File - Settings - Print Options / Hide.